Welcome
To join our community, please login or register!
Internet Explorer
Internet Explorer is not supported. Please upgrade to a more modern browser.

Home


Simple Survival Wikipedia

Welcome to Simple! Please use the sidebar to navigate through the Wiki, and if you have any questions, do not hesitate to ask, either on our forums, discord or contact form.

You will need to be a registered member to view some of our Wikipedia!  Please log in or create an account at the top of the page.


Last edited by:
ImEvo6 months ago
14740

Player Warps


Player Warps

You can create public warps with the help of a warp token (found in reward crates or sold from other players) and the balance of 500k. Once you have redeemed your warp token (left click), Type /warp set <name> (in the place you wish to set your warp)! Those are all the simple steps you need to set your warp!  

You can only create warps in claims. If you abandon the claim, the warp will disappear and you will lose the 500k but keep the token. Please also keep in mind that warps will disappear after 30 days of inactivity and a refund will not be given!

Other Features (/warp help) 

  • Give your warp a description with /warp desc set <name> <desc> 
  • Set your warp category with /warp category <warp> <category> 
    •  (Warps can be set as houses, farms, pvp or other warps) 
  • Give your warp an icon with /warp icon set - (Hold the item you wish to set as the icon)
  • You can also move the set location and rename your warp but keep in mind these cost 25k per change! 
    • /warp reset <warp> 
    • /warp rename <warp> <name>
  • Lastly you can also rate warps with 1-5 stars with /warp rate <warp> <rate> but do not abuse this command by being unkind to others!

Last edited by:
Jadziaa4 months ago
367

Land Claims


Land Claims


Here is a quick run-down on how to use the land claims feature on the server!


How to create a claim:

  • First step is obtaining a gold shovel through /kit claim or crafting your own gold shovel.

  • You can use a stick and right click a block to see if the land is claimed or not

  • You can use /claimslist to see a list of all your different claims and the co-ordinates of where the claims are located

Option 1

Stand in an area and type the command /claim and this command will automatically create a claim for you (11x11 area)

Option 2

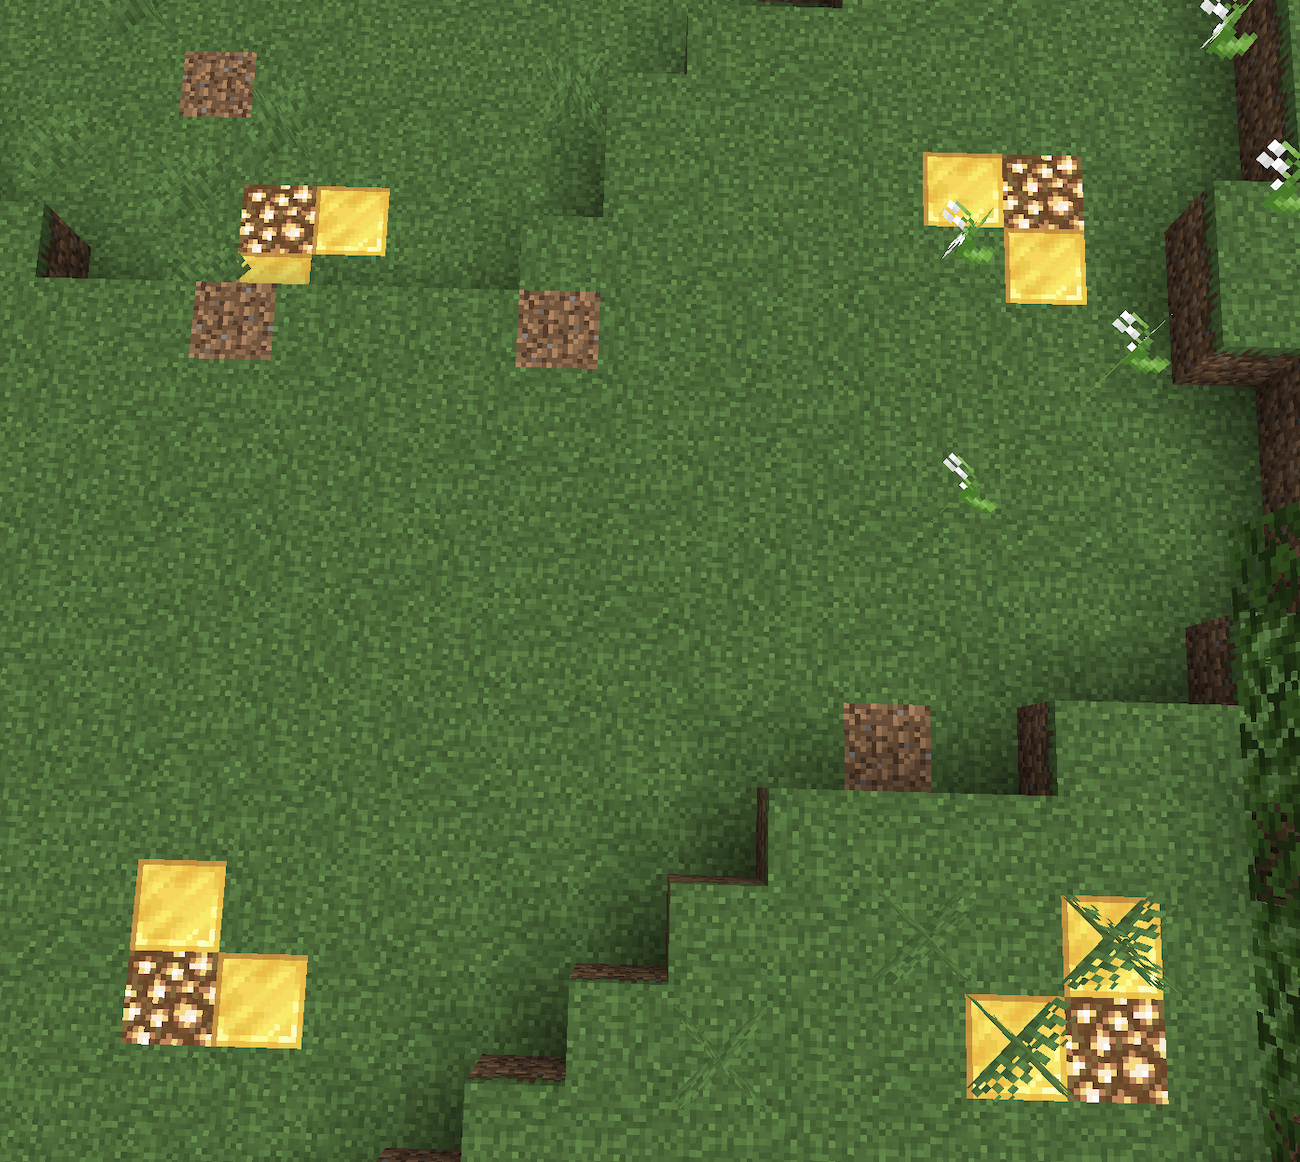
However, you can create your own claim by using the gold shovel. Right click the ground, which will set the first claim corner and then right click in a new area to create the second corner of the claim. The claim must be bigger than 100 blocks.


How to trust players to your claim:

  • /accesstrust <name> or /at - Gives access to players to use buttons, levers, doors, trapdoors. You can also give everyone access trust by typing /accesstrust all - which is useful when creating public spaces. 
  • /containertrust <name> or /ct – Gives players access to containers and animals in the claims. Players will also inherit the access trust permissions alongside this. You can also give everyone container trust by typing /containertrust all – which can be helpful when creating public space. 

  • /trust <name> - Gives players permission to build in the claim alongside the container and access trust permissions. 

  • /permissiontrust <name> or /pt – This allows players to manage the claim, which means others can control who is trusted to the claim with trust, containertrust or access trust. Players can also extend or shrink the claim, but they cannot give anyone else permission trust.

  • You can run any of these commands outside of your claim but this will grant a player trust in ALL of your claims 

  • /trustlist - Will give you a list of who has permissions in the claim you are standing in (you need permission trust or to be the owner of the claim to type this command) 

How to expand or resize your claim:

Option 1

/expandclaim <number> - The number can either be a positive (will expand the claim) or a negative (will shrink the claim) number. You must hold a gold shovel and run the command facing the direction you want to make the adjustment to your claim.


For example: You currently have a 11x11 claim and type the command (/expandclaim 2) the claim will expand 2 blocks in one direction and become a 13x11claim but if you ran the command in a negative number (/expandclaim -2) your claim will become a 9x11.


Option 2

The option is by resizing the claim by right clicking the claim corner (glowstone which will disappear when entering the resizing mode) and then you can right click the ground again to recreate the new claim corner. You can resize the claim in any direction.


How to create a subdivide:


Type /subdivideclaim to enter this mode (whilst holding the gold shovel). 


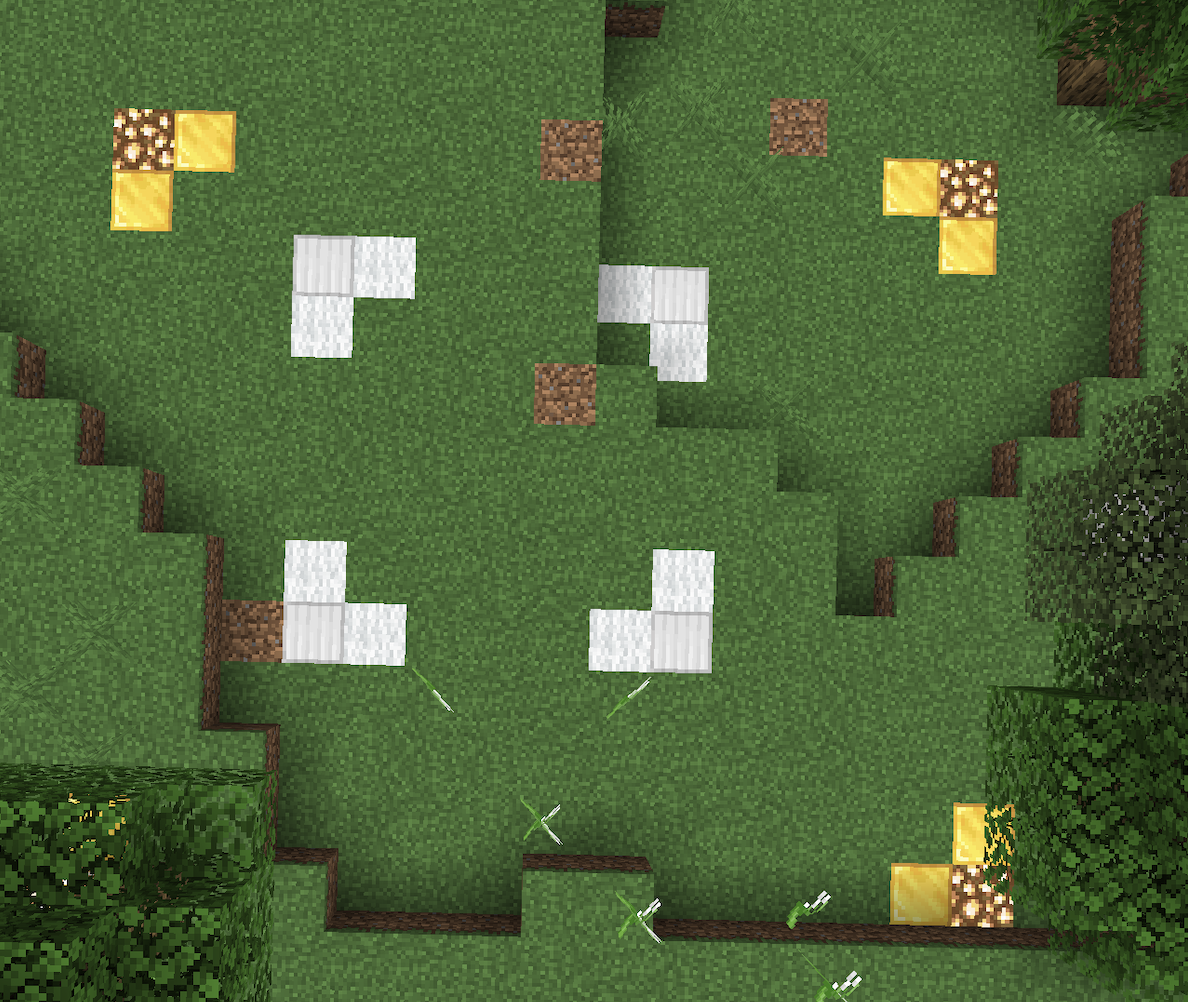
Right click the ground to create the first subdivide claim corner (within your current claim) and then right click the ground to create the other claim corner. The subdivide will now have been created and this will be outlined in white wool/iron blocks as the corners. 


To remove the subdivide claim type /unclaim, whilst standing in the subdivide and this will only remove the subdivide and not the overall claim. Please only run this command once to avoid unclaiming the parent claim. 


To not allow the subdivide claim to follow the main claims permissions, use /restrictsubclaim and type the same command to reverse these changes. 


If you ran /trustlist in the subdivide, it will inform you whether the subdivide claim is following the main claims permissions or not.

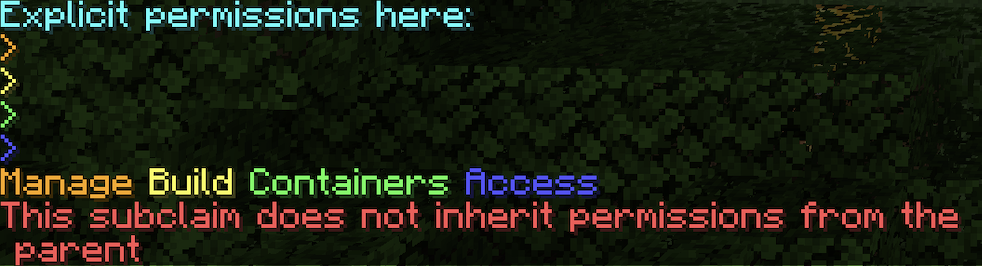
- The red text indicates the sub claim does not follow the trustlist from the parent claim 

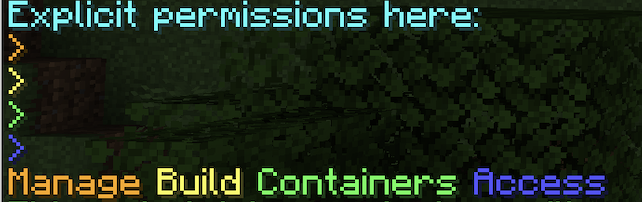
- Does not include red text at the botton, which means this sub claim will follow the parent claim 


Last edited by:
Jadziaa4 months ago
277

Magic Hoppers


Magic Hoppers 

Hoppers can only be obtained through the vote crate (5% chance). They are player dependent so that you can not trade them with other players. This means you can not access, place or break other players hoppers.  

Depending on your vote rank, will depend on how many magic hoppers you can place: 
Nublet: 1
Nomad: 3 
Settler: 5
Commoner: 7 
Squire: 9 
Esquire: 11
Knight: 13
Noble: 15
Veteran: 17
Hero: 19
Legend: 21
Saint: 23
Fabled: 25
Immortal: 27 
Mythic: 29
Angel: 31
Titan: 33
Deity: 35

How to use the hopper? 

Once you've obtained a hopper, place the hopper in the desired spot. 

Left click: opens the hopper gui. The gui allows you make cool changes, which is explained further below.

Right click: opens the hopper inventory 


How to break the hopper? 
Use any pickaxe and left click the hopper, whilst using shift 

How can you upgrade the magic hopper? 
There are 4 different features that can be upgraded: 

Links -> Number of containers that can be linked to the magic hopper 
Starting  - 1 container
First upgrade: 2 container links ($5k) 
Second upgrade: 3 container links ($8k) 
Max upgrade: 4 container links ($10k)

Transfer amount -> Number of items that can be transferred in one cycle 
Starting - 4 
First upgrade: 8 ($4k) 
Second upgrade: 11 ($6k) 
Third upgrade: 14 ($17.5k) 
Fourth upgrade: 17 ($35k) 
Max upgrade: 21 ($70k) 

Suction radius -> The hopper will suck all the items into the hopper within the radius 
Starting - 1 
First upgrade: 2 ($500)
Second upgrade: 3 ($5k) 
Third upgrade: 4 ($7.5k)
Max upgrade 5 ($15k) 

Max link distance -> The max distance between the container and hopper 
Starting - 25
First upgrade: 50 ($5k) 
Second upgrade: 75 ($7.5k) 
Max upgrade: 100 ($9k) 

How to link containers to the hopper?
Open the hopper gui (left click)
Left click the nether portal head (right click the nether portal head to enter unlinking mode instead) 
Click the desired container you wish to link (chests, barrels, shulkers, etc) 
 
How to use the filtering method? 
Once you've linked the containers to the magic hopper, you can use filters to tell the hopper what items you'd like to go into your container links. 

1. Open the hopper gui (left click) 
2. Click the chest head (next to the nether portal head) 

If you hover of your links with your mouse a description of the item will come up (example shown below). You'll be able to find out where the container is located (cords + world), change the priority of container order (higher priority = first container to fill up)

If you left click one of the container links you'll be able to add/change filters 
You can add filters by left clicking items in your inventory (no items will be lost) 

Hopper: Switch between whitelist and blacklist  
Whitelist: Only allows items that are listed in this filter
Blacklist: Doesn't allow items that are listed in this filtler

Oak door: toggle strict filtering 
Hoppers will ensure items have the same enchantment, name, lore, durabliity etc! 

Recycling bin head:
Allows you to copy/paste to individual/all container links 


Other features (found once you open the hopper gui) 


Last edited by:
Blream3 months ago
388

Entities Explained


Our Entity rules explained

How are Mobs on the server automatically moderated to reduce large farms and lag?

Unfortunately, Minecraft is primarily a single-player game. Therefore, everything is designed around single-player worlds. If we left single-player rules with 40+ players online, the server simply wouldn't be able to handle the load and ultimately be unplayable and crash.

So we have to implement rules for mobs, entities and how they can spawn and exist in the world.

The first thing you must understand is that mobs aren't moderated per-chunk. They are moderated in a 5x5 chunk area, your view distance in-game (2 chunks between each entity)

For example, if you have 10 villagers within a single chunk, you won't be able to spawn anymore within your view distance. See the below diagram for an example. 10 villagers are in the central green chunk, so no villagers can exist in the red chunks. The outer green chunks are far away enough from the 10 villagers for more villagers to exist, however they will not function unless they are in you are in your stimulation distance. 

Keep in mind that you try to bypass the limit, the extra entities over the max limit will automatically despawn. Anyone trying to bypass the limits will be punished accordingly. 


Last edited by:
Jadziaa4 months ago
836

Mob Limits


Entity Limits

You can only have the maximum amount specified here within your render distance in-game, 3 chunks apart - 2 empty chunks between them.
If you wish to make multiple villager trading halls for example, they must be more than 3 chunks apart.

Passive Mobs
Skeleton Horse: 3
Zombie Horse: 3
Donkey: 3
Mule: 3
Giant: 1
Pig: 10
Sheep: 10
Cow: 10
Chicken: 10
Squid: 3
Wolf: 5
Mooshroom: 10
Snow Golem: 5
Ocelot: 10
Iron Golem: 5
Horse: 3
Rabbit: 5
Polar Bear: 5
Llama: 5
Parrot: 5
Villager: 10
Turtle: 10
Cod: 5
Salmon: 5
Pufferfish: 5
Tropical Fish: 5
Dolphin: 2
Cat: 8
Panda: 3
Trader Llama: 3
Wandering Trader: 3
Fox: 3
Bee: 10
Strider: 10
Bat: 0
Axolotl: 5
Glow Squid: 3
Goat: 10
Frog: 10
Tadpole: 10
Allay: 10
Camel: 10
Sniffer: 10

Hostile/Neutral Mobs
Elder Guardian: 2
Wither Skeleton: 5
Stray: 10
Husk: 10
Zombie Villager: 5
Evoker: 5
Vex: 5
Vindicator: 5
Pillager: 1
Ravager: 1
Illusioner: 5
Creeper: 10
Skeleton: 10
Spider: 10
Zombie: 10
Slime: 5
Ghast: 5
Zombified Piglin: 10
Enderman: 10
Cave Spider: 10
Silverfish: 10
Blaze: 10
Magma Cube: 10
Ender Dragon: 1
Wither: 1
Witch: 10
Endermite: 3
Guardian: 10
Drowned: 10
Hoglin: 10
Piglin: 10
Zoglin: 10
Piglin Brute: 10
Shulker: 10
Phantom: 5 

Other Entities
Painting: 5
Arrow: 5
Splash Potion: 10
Item Frame: 10
Glow Item Frame: 10
Armor Stand: 10
Evoker Fangs: 3
Boat: 5
Minecart: 5
Minecart Chest: 5
Minecart Furnace: 5
Minecart TNT: 1
Minecart Hopper: 10
Minecart Mob Spawner: 5
Ender Crystal: 4
Hopper: 20
Piston: 20
Sticky Piston: 20
Observer: 20
Redstone torch: 16
Primed TNT: 10
Firework: 10
Spawner: 4
Boat Chest: 5 

Farming Limits
Bamboo: 40
Cactus: 40
Kelp: 40
Melon: 40
Pumpkin: 40
Sugarcane: 40
Twisting Vines: 40
Weeping Vines: 40


Last edited by:
Jadziaa2 months ago
1282